Introduction
The MySQL APT repository provides a simple and convenient way to install and update MySQL products with the latest software packages using Apt.
The MySQL APT repository provides MySQL packages for the following Linux distros:
- Debian
- Ubuntu
The MySQL APT repository includes the latest versions of:
- MySQL 8.2
- MySQL 8.1
- MySQL 8.0
- MySQL 5.7
- MySQL Cluster 8.2
- MySQL Cluster 8.1
- MySQL Cluster 8.0
- MySQL Cluster 7.6
- MySQL Cluster 7.5
- MySQL Workbench - Ubuntu Only
- MySQL Router
- MySQL Shell
- MySQL Connector/C++
- MySQL Connector/J
- MySQL Connector/ODBC
- MySQL Connector/Python
Step 1: Add MySQL Apt Repository
Downloading the repository package using the wget or curl tool from the command line.
wget
wget -c https://dev.mysql.com/get/mysql-apt-config_0.8.34-1_all.debOr use curl
curl -OL https://dev.mysql.com/get/mysql-apt-config_0.8.34-1_all.debThen install the MySQL repository package using the following dpkg command.
sudo dpkg -i mysql-apt-config_0.8.34-1_all.deb
Step 2: Install MySQL Server in Ubuntu
Next, download the latest package information from all configured repositories, including the recently added MySQL repository.
sudo apt updateThen run the following command to install packages for the MySQL community server
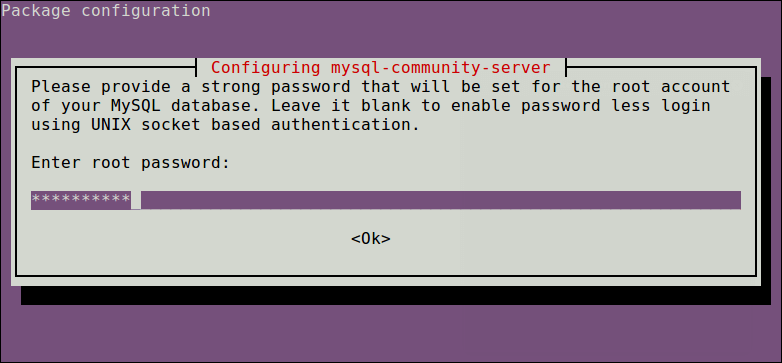
sudo apt-get install mysql-serverThrough the installation process, you will be asked to enter a password for the root user for your MySQL server, re-enter the password to confirm it, and press [Enter].

You will be asked to select the default authentication plugin to use, then use the right arrow to choose Ok and press [Enter] to complete the package configuration.

Step 3: Secure MySQL Server Installation
By default, the MySQL installation is insecure.
Execute the below script
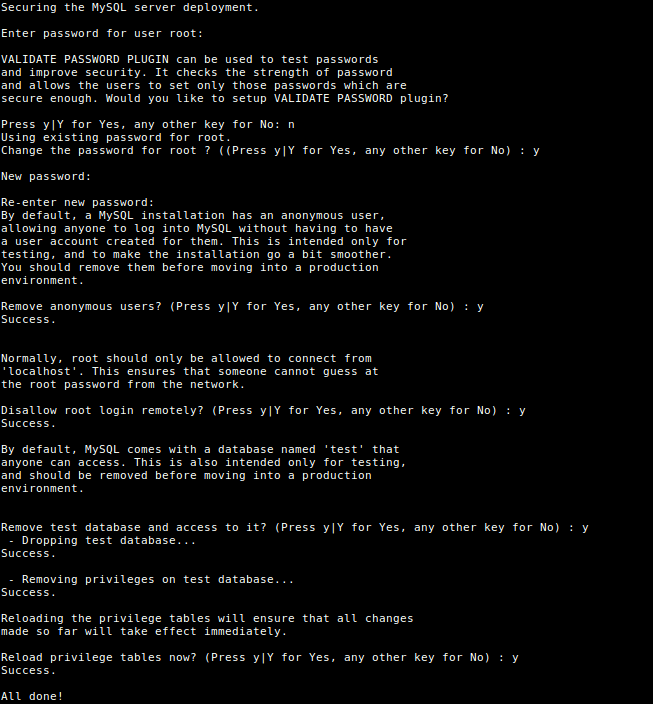
sudo mysql_secure_installationYou will be asked to enter the root password you set during installation. Then also choose whether to use the VALIDATE PASSWORD plugin or not.
- Change the password for root: if you want press
Y - Remove anonymous users? :
y - Disallow root login remotely? :
y - Remove the test database and access it. :
y - Reload privilege tables now? :
y

Step 4: Managing MySQL Server via Systemd
To Know the Server Status run the below command
sudo systemctl status mysql
Step 5: Auto Restart on System or Server Boot
sudo systemctl enable mysqlFinally, to access the MySQL shell
sudo mysql -u root -pFor more additional or advanced requirements follow this Official Link.

